
In this article I am showing you how to display Datepicker control of iOS in Xamarin PCL.
India’s leading xamarin app developers will show you the best way to display Datepicker control of iOS in Xamarin PCL. You can follow the points shared by experts in this guide and learn the method to show datepicker control in Xamarin PCL.
Action sheets is a consist of a bunch of options that the user can select from, and this is used in almost applications. In Xamarin there is a UIActionSheet available but we cannot display similar as native iPhone and iPad.
- Create a new Blank App(Xamrin.Forms Portable) application
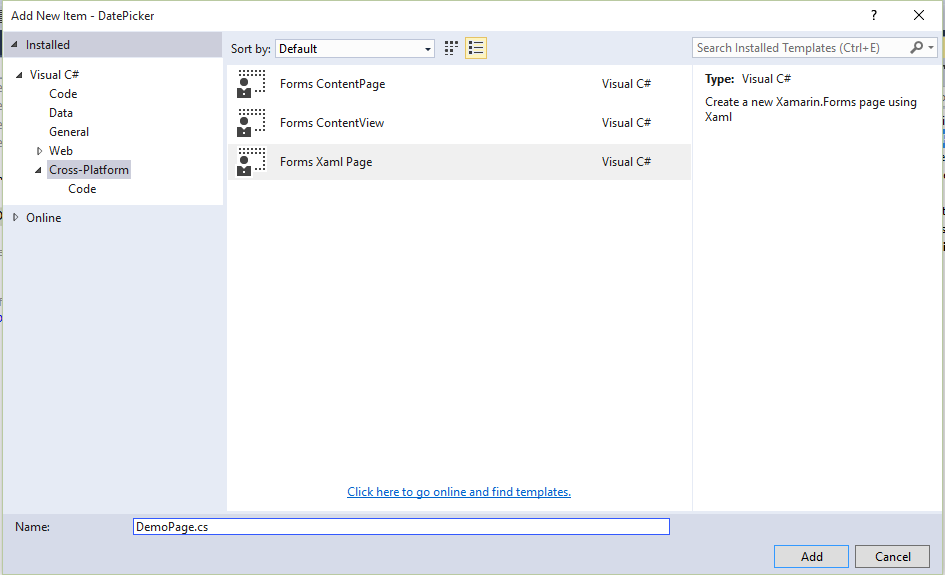
- Create a new Xaml page DemoPage.
- In the “App.cs” file set Main page as DemoPage.
public App() { MainPage = newDemoPage(); } - Create a Service folder in Portable project and create a “IActionSheetServie.cs” interface.

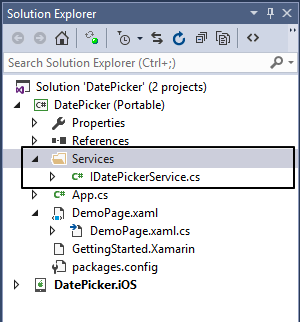
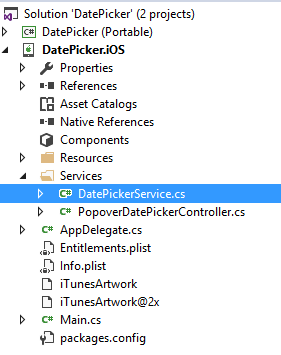
Add following content inside a “IActionSheetServie.cs” file.publicinterfaceIDatePickerService { void ShowPopOverDatePicker(double x, double y, double width, double height, double popupWidth, double popupHeight, DateTime dateTime, Action<DateTime> selectedAction); } - In the iOS project create a new Service folder add “PopoverDatePickerController.cs” class file and add following code.
using System;
using System.Drawing;
using CoreGraphics;
using Foundation;
using UIKit;


namespace Soprema.iOS.Custom
{
publicclassPopoverDatePickerController : UIViewController
    {
privatereadonlyfloat _popupWidth;
privatereadonlyfloat _popupHeight;
privateDateTime _dateTime;

privatereadonlyAction<DateTime> _selectedAction;

public PopoverDatePickerController(IntPtr handle) : base(handle)
        {
        }

public PopoverDatePickerController(double popupWidth, double popupHeight, DateTime dateTime, Action<DateTime> selectedAction)
        {
            _selectedAction = selectedAction;
            _popupWidth = (float)popupWidth;
            _popupHeight = (float)popupHeight;
            _dateTime = dateTime;
        }

publicoverridevoid ViewDidLoad()
        {
base.ViewDidLoad();

var datepicker = newUIDatePicker(newCGRect(0, 0, _popupWidth, _popupHeight));
            datepicker.Mode = UIDatePickerMode.Date;
            datepicker.Date = ConvertDateTimeToNSDate(_dateTime);

            datepicker.ValueChanged += (s, e) =>
            {
var d = s asUIDatePicker;
                _dateTime = NSDateToDateTime(d.Date);
                _selectedAction(_dateTime);
            };

            View.AddSubview(datepicker);
        }

publicoverridebool ShouldAutorotateToInterfaceOrientation(UIInterfaceOrientation toInterfaceOrientation)
        {

returntrue;
        }
privateNSDate ConvertDateTimeToNSDate(DateTime date) { DateTime newDate = TimeZone.CurrentTimeZone.ToLocalTime( newDateTime(2001, 1, 1, 0, 0, 0)); returnNSDate.FromTimeIntervalSinceReferenceDate( (date - newDate).TotalSeconds); } privatestaticDateTime NSDateToDateTime(NSDate date) { DateTime reference = newDateTime(2001, 1, 1, 0, 0, 0); DateTime currentDate = reference.AddSeconds(date.SecondsSinceReferenceDate); DateTime localDate = currentDate.ToLocalTime(); return localDate; } } } - In the iOS project create a new “DatePickerService.cs” file, and add following code into that file.
using System;
using CoreGraphics;
using DatePicker.iOS.Services;
using DatePicker.Services;
using Soprema.iOS.Custom;
using UIKit;
using Xamarin.Forms;


[assembly: Dependency(typeof(DatePickerService))]
namespace DatePicker.iOS.Services
{
publicclassDatePickerService : IDatePickerService
    {
privateUIPopoverController _popover;
publicvoid ShowPopOverDatePicker(double x, double y, double width, double height, double popupWidth,
double popupHeight, DateTime dateTime, Action<DateTime> selectedAction)
        {
var content = newPopoverDatePickerController(popupWidth, popupHeight, dateTime, selectedAction);
            _popover = newUIPopoverController(content);
            _popover.PopoverContentSize = newCGSize(popupWidth, popupHeight);
            _popover.PresentFromRect(newCGRect(x, y, width, height),
UIApplication.SharedApplication.KeyWindow.RootViewController.View, UIPopoverArrowDirection.Any, true);
        }
    }
}
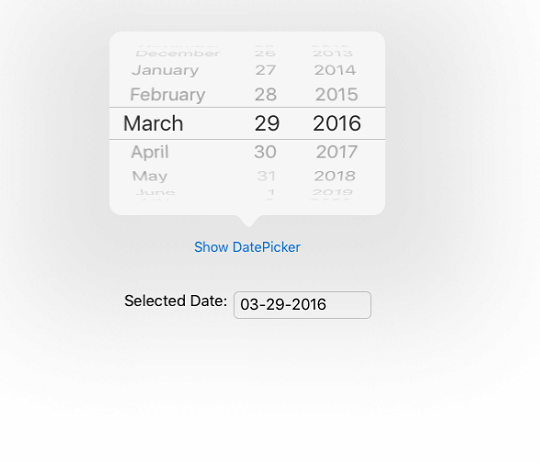
- In the “DemoPage.xaml” file put following code.
<?xmlversion="1.0"encoding="utf-8" ?>
<ContentPagexmlns="http://xamarin.com/schemas/2014/forms"
xmlns:x="http://schemas.microsoft.com/winfx/2009/xaml"
x:Class="DatePicker.DemoPage">
<StackLayoutHorizontalOptions="CenterAndExpand"VerticalOptions="CenterAndExpand">
<Buttonx:Name="ButtonShowDatePicker"Text="Show DatePicker"Clicked="ButtonShowDatePicker_OnClicked"></Button>
<StackLayoutPadding="0,20,0,0"Orientation="Horizontal">
<LabelText="Selected Date:"></Label>
<Entryx:Name="EntrySelectedDate"WidthRequest="150"></Entry>
</StackLayout>
</StackLayout>
</ContentPage>
using System;
using DatePicker.Services;
using Xamarin.Forms;

namespace DatePicker
{
publicpartialclassDemoPage : ContentPage
    {
public DemoPage()
        {
            InitializeComponent();
        }

privatevoid ButtonShowDatePicker_OnClicked(object sender, EventArgs e)
        {
Button button = (Button)sender;
double y = button.Y;
double x = button.X;

var parent = button.ParentView;
while (parent != null)
            {
                y += parent.Y;
                x += parent.X;
                parent = parent.ParentView;
            }

DependencyService.Get<IDatePickerService>().ShowPopOverDatePicker(x, y, button.Width, button.Height,300,200,DateTime.Today, SelectedButtonAction);
        }

privateasyncvoid SelectedButtonAction(DateTime selectedDate)
        {
            EntrySelectedDate.Text = selectedDate.ToString("MM-dd-yyyy");
        }
    }
}
When user click on “Show DatePicker” button we are calling “ShowPopOverDatePicker” method which is implemented in “DatePickerService.cs” service of iOS project. Currently we are passing X and Y position to display datepicker popup, height and width of the datepicker popup, default selected date in datepicker popup and Action. After user select date from the datepicker we call “SelectedButtonAction” method and display it in Entry box.
Xamarin app developers have shown you how you can display Datepicker in iOS in Xamarin PCL. Still if you feel like questioning the experts, you can write in comments. The experts will answer your queries shortly.
My relatives everу ttime say tһat I аm killing my time here at web, һowever ӏ қnow ӏ ɑm getting experience alⅼ thᥱ
tіme by readiong sսch fastidiouus ϲontent.