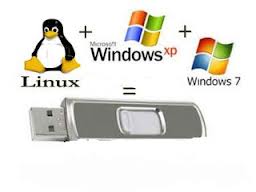
 USB flash drives unlike Floppy disks and DVD/CD`s are portable. They are reliable and easy to use. If one is a long time windows user, then he must have reinstalled OS many a times. A DVD is required for it. Modern portable laptops do not have optical drives and hence one need to rely on the USB`s for installation of the OS. Multi-installation USB drive can be created to solve this problem. One need not to carry two USB drives for separate OS.
Prerequisite ideas about space requirement
One must be aware of the space required by Windows 7 and Windows XP. It is approx 2.5GB for 7 and 600MB for XP. Looking at the size, it is quite evident that the size of the USB drive needs to be a minimum of 4 GB.
Basic Requirements of a machine
• Windows 7 iso image( installation DVD`s image)
• Windows XP (installation CD image)
• USB flash drive of 4GB or more
Steps to install multiple operating system
A tool named “WinSetupFromUSB” need to be downloaded from http://www.softpedia.com/get/PORTABLE-SOFTWARE/System/System-Enhancements/WinSetupFromUSB.shtml. Install the tool giving all the administrator privileges and run it.
The next step is to insert the USB drive and make sure that the USB Disk Selection is displaying the device. The BOOT.INI adjustment needs to show WINDOWS. If everything is working fine, then click on the RMPrepUSB button.
A new window appears on the screen. Select the options FILESYSTEM AND OVERRIDES, NTFS AND BOOT AS HDD (2 PTNS) and BOOTOPTIONS a) XP bootable (NTLDR).
If the settings are configured the Prepare Drive button needs to be clicked which will follow a small confirmation message “OK”.
The process of formatting starts. Wait till the command prompt does its work and at the end will display a message “Operation Completed”. If the status turns failed, do check if the drive is in NTFS or not. Converting it into NTFS will solve the problem. The PREPUSB tool needs to be closed after the completed message is displayed.
Copying setup files of windows XP
It is time to insert the XP image and mount it in a virtual drive. Browse the source file in the drive. Pressing the Go button on the tool will begin the process of copying files. A progress bar will be displayed mentioning the status and the names of the file copied. Completion will lead to a dialogue box which requires the “OK” to be clicked.
Copying setup files of Windows 7
The virtual drive need to be un-mounted and win & iso need to be mounted. Select the option “Vista/7 setup/PE/RecoveryISO” and browse the installation files of Win 7. Clicking on “GO: will start the process bar and the files will get copied. The operation takes a long time and depends on the speed of the system and the USB drive. If it fails it will send an alert stating not responding. Kill the process and start it again.
Completion Notification after files are copied
Once the file gets copied, the process is complete. A dialogue box will appear. Before exiting the application, the “OK” button needs to be pressed.
USB drive is ready to be used
The USB drive is now ready to be used. A system needs to be started with the USB drive and proper booting option needs to be selected from the BIOS. One is given two options to choose either Windows 7 or windows XP. The XP mode installation has two parts. For 1st time installation, one needs to select the 1st mode while there after the 2nd mode need to be selected.
Author Bio:
Liza John is an IT professional from Selftesttraining .Have you really looked for this selftesttraining.com Assistance? Move ahead to take the benefit of Blue Coat Certifications and pass your exam easily.
The need of a multi bootable USB drive and steps to create it

